How to Prevent Rust on Stainless Steel Appliances

Do you know the process to prevent rust on stainless steel appliances? Your stainless steel is very expensive and exclusive. So it would be best if you prevented rust on stainless steel appliances. Here, I will discuss how to prevent rust on stainless steel appliances.

Typical steel is produced using iron and carbon, consolidating to shape a high-quality material. Hardened steel is imbued with chromium also, which is an imperceptible substance layer that shields it from different warmth, dampness, and synthetic presentation.

Rust and Stainless steel

Rust and Stainless steel

You may find three general classes of treated steel erosion that can occur thus:

• When the outside of the steel contacts a corrosive based material, regularly one found in family unit cleaners
• When minuscule pits structure in the hardened steel after it’s presented to salt, water, food, or whatever else that has high chloride content. At the point when these pits are excessively little for oxygen to get to, chromium can’t manage its responsibility, and rust can appear.
• At the point when two distinct metals get in touch with one another, and there’s dampness present, for example, when jolts or connectors hold treated steel segments together.
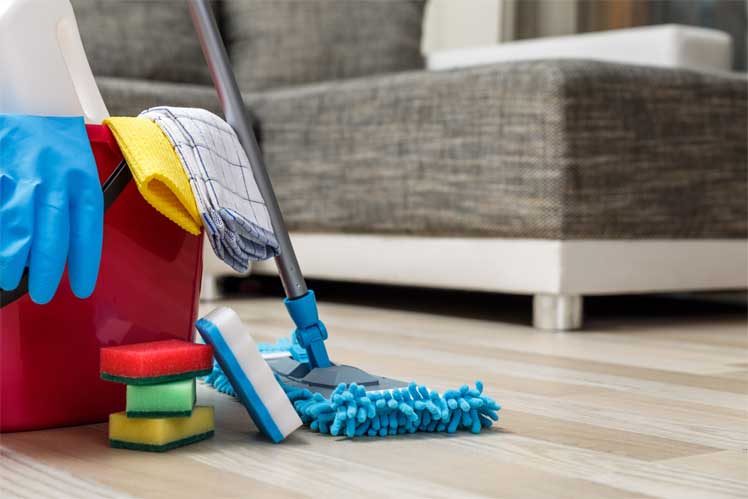
CLEAN RUST

Take a couple of significant precautionary measures prior to cleaning. Make sure to peruse the marks behind items and adhere to the producer’s guidelines.

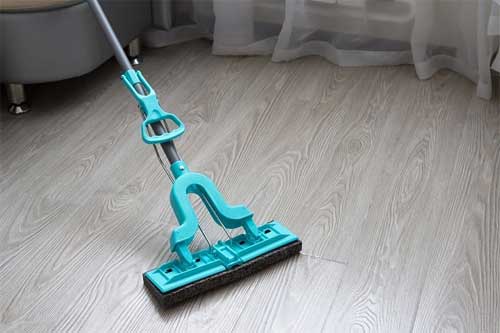
• Utilize hardened steel cleaners that contain oxalic corrosive. That sounds cruel, yet oxalic corrosive is a natural compound from plants. Straightforward Green makes a tempered steel cleaner with normal fixings. Bar Keeper’s Friend Soft Cleanser is another item that is sheltered to utilize.
• Clean toward the grain to forestall, starting to expose what’s underneath. You may not see the grain lines on certain machines. One approach to discover is by scouring a delicate fabric on a level plane and vertically on a superficial level.
• You should feel a slight “pull” when you rub contrary to what would be expected.

Well, try to follow the below steps:

Well, try to follow the below steps

Rub the glue onto your hardened steel surface toward the grain utilizing a delicate, clean material.

Flush the bigger surface region—be it the bowl of your sink or a segment of your tempered steel counters—altogether to eliminate any trash and hose the surface. Learn more: https://www.kaadyappliances.com/

Hand-wash cookware and clothing that cause rusting in a dishwasher and clothes washer, for example, solid metal skillets or consumed metallic catches on an old dress. Utilize a huge plastic container or a utility sink, all things being equal.

Put a defensive wax covering the outside of your machines, utilizing an “apparatus clean,” adhering to the bundle’s directions. These items shield the surface from erosion while likewise re-establishing the first sparkle and gloss. A few clean additionally incorporate cleaning operators, eliminating developed soil.

Cream of tartar is powdered tartaric corrosive, and simply like acidic corrosive, it consumes rust spots easily. Join the cream of tartar and lemon juice in a bowl. Dunk the wipe or dishcloth in the blend, and apply it to the rust spot. Delicately scour at the spot until the stain lifts away. Wash the spot with clean water, and wipe it dry with a perfect fabric.

Now you have realized how to prevent rust on stainless steel appliances. Try to follow the above tips and suggestions.

How to Remove Stopper from Bathroom Sink Drain?

Bathroom sink and its uses:

In each and every bathroom, there will be a sink attached in the bathroom. It will be helpful in many ways. And it is mostly used in modern homes. We can’t use water taps and buckets for each and every use, and it will be lower in height too. We can’t bend in the morning and aged persons will have back pain problems too. So they will feel difficulty for using the tubs. So to avoid those facts nowadays bathroom are built up with sinks. It is mainly used for brushing the teeth and refreshment purposes. We can wash our face easily here during the evening time or once we get to home after the outing. In the sink there will be stopper attached to it. It is used to prevent the things get follow in the water. The stopper will allow only the water to flow of. Other than water no things will get flow in it. This is the use of stopper in sink.

Remove of stopper from it:

Remove of stopper from it

There are many kinds of stoppers are used in the sinks. Some are modern technologies and some are olden one. In most houses we can see the olden model only, newly built home only has modern type stopper. Both kinds can be used here. In modern type, that is pop up type is used. Pop up type means the button type stopper is used. It will be bulge at the top and it will be pressing type too. We need to press the pop up button and the water, or dirt found in the sink will get out. It is new model, many people started to use this because of convenient and easy to wash off the sink. Only we need to press the button and the water will drain off. It is easy way to clean up. But in another method we need to remove the stopper from the sink. It is not so easy to remove the stopper from the sink at once.

Here we need to use some material to remove the stopper. Hook like material is used here to pull the stopper. The stopper will be in round shape with holes in it. The hook needs to install in the stopper hole and remove it. It was somewhat difficult too. Once the stopper gets removed from the sink, it become loose and get out of the sink drain often. Bathroom sink stopper stuck is most useful thing. Without stopper the sink won’t complete. Because the things may drain out easily without our knowledge and we can’t search it for too. The spreading of infections will be also high in sink without stopper. Insects can also use those sinks. So the infections will spread to all. If the stopper is there, insects can’t go inside the tube. It is better to use the modern technology stopper to avoid the broken of old one and in new technology the of spreading of infections will be also low because there is no holes in this stopper.

How to Change Sponge Mop Head?

Generally, the mops are very basic endless useful things. The mops are made for the efficient cleaning process. The tool is used for cleaning without bacteria. And other viruses on the floor area are spreading more which is potentially harmful too. It majorly contributes to those bacteria and virus. At this juncture, there is a necessity to change the mop head is very much important. If you are careful about this change, then you will affect more and the spreading of hundreds to billions of bacteria. The floor surface without moping is not possible to clean perfectly. If you are not using the right mop for the surface cleaning then the bacteria spreading increased or multiplying. However, proper handling is needed in mop cleaning. Normally, the mop head contains millions of bacteria. Hence, the often replacement is required in the mop head.

What are the key indications to change the sponge mop head?

What are the key indications to change the sponge mop head

The frequent using of mops is changed after 500 washing approximately. A most common sign of changing the mop head needs to know at first. It is the basic key indication which is described as follows. The expiration point is to identify by the part of the mop is discolored. Especially microfiber best sponge mops are got wet and dust. This is indicated the time to change the mop head. If your mop looks like the old toothbrush, then you must change this. Sometimes improper cleaning makes the sponge mop spoil. Hence the proper maintenance is required in the sponge mop. Even washing every time after use is the best to maintain the sponge mop. Then correct detergent is to be used for the cleaning process.

The hygiene instruction of changing sponge mops head:

Probably the dirty floor is to clean which is the necessary task. At first, wring out the old mop and face to the handle to up. After reaching the head, loosen the wing nut. There is a need to clamp down the mop head. Then loosen the head of the mop free from the clamp. An adjustment is required in the knob and plastic clip can change quickly. At first, the best sponge mops are available in the home improvement stores. You can buy it for the big sponge. Then dispose of the old and remove the package of the new mop head. The vice versa action is required to fix the new one. That is after detaching the old mop handle and head, after measuring the size of the sponge and cut off it. Then use the rubber cement generously and melt for the thickness which your mop suit. Then let it dry for a day to set the sponge head properly. Then frequent changes can possible by using this method of changing. This new mop head feel like a durable and most cellulose sponges are usually made up of wood fibers. The rubber cement lightly melts the form but it cleans the floor very well. Because of its bond of cement and sponge which works longer.

How Long Does Broccoli Last in the Fridge?

Everybody talks about a healthy diet. A diet that enriched with proteins, vitamins, fibres, calcium, and other essential nutrients can be the best meal for you.

There are many healthy food items in the world. But have you ever listened to the name of broccoli? You will find this food item healthy and easy to take and keep.

It contains essential elements of nutrients that our body needs, such as protein, potassium, calcium, fibres, folic acid, and vitamins, etc. You can preserve it in the fridge and can use it for many days. But you need to keep in a proper way to store broccoli in the fridge.

Today here we will tell you the proper way to store broccoli in fridges for keeping them fresh. Please read our article how long does broccoli last in the fridge?

How long does broccoli last in the fridge?

How long does broccoli last in the fridge

It depends on your way of storing the broccoli in the fridge. Before storing in the fridge if you properly covered the broccoli in the plastic or aluminium wrap and keep your fridge on minimum eight hours a day, it will stay fresh for three to four days.

But the main thing is how better you can store this food in your fridge. So, we will here tell you about how you properly store broccoli in the fridge.

While you purchase broccoli, put it in the fridge and do not wash it before use.

When you keep it in the store, cover it with plastic wrap or aluminium foil it will help you to keep your broccoli fresh for 3 to 4 days.

How long does raw broccoli last in the fridge?

How long does raw broccoli last in the fridge

If you keep your raw broccoli as per above proper way, then you can store them for four to five days and only wash them when you are ready to cook them. Always wash the broccoli with fresh water.

How long chopped broccoli last in the fridge?

You want to keep chopped or sliced broccoli in the fridge? You can also store this broccoli but only for two to three days.

How long cooked broccoli last in the fridge?

Our answer about cooked broccoli is again the same, it depends on how properly you keep them in the fridge. If you store cooked broccoli in the refrigerator n standard cooling, it will remain fresh for three to five days.

But right freezing can last their freshness for one year in your freezer. Research also reveals that if you maintain proper freezing and keep properly, it will remain fresh for more than eighteen months.

Important to Note?

While you take your broccoli from fridge check it thoroughly if its colour changed, it becomes soft and gummy then please do not use them. There also smell a way to check their freshness; it can harm you if you eat.

Final Thoughts:

You have known well from our article about how long does broccoli last in the fridge? That broccoli is excellent and healthy food items for us.

We have also provided you with details about how long you can store them in your fridge. We hope our article is helpful to you.

What are the Different Types of Bathtub Drains?

With every new day, we see new varieties of everything like other products; there are many of the verities of bathtub drains available in the market.

Bathtub fixtures which are popular purchase only for the decorative purpose in your bath, but the drains are the parts which help the bathtub stoppers to keep the water inside. You can control the flow of water such as flow and stop the water with a drain in the bathtub.

While you enter the market, you may get confused about what to buy and what to not, there are hundreds of varieties available in the market which can make you double-minded.

Today we will explain to you the types of bathtub drain, after knowing that you will able to make a decision about which one is suitable for your bathtub.

Types of Bathtub Drains:

Different Types of Bathtub Drains

‘Here, we are providing you with some common types of tub drains.

Lift- Turn drains for Bathtub:

In these types of bathtub drain, you will find the small knob on the top with which you can identify it. With its help, you can open and close the drain with simple twisting. You can hold the water in it when turned it.

You can easily install this item; you just need to screw it from the middle and then squeeze it from the centre. Take care while tightening because if you make it too much tightening, it will create a sticking issue. This type of drain is also straightforward to remove just with the help of a screw.

Push-Pull drain for the bathtub:

Push and pull drain bathtub is the same as the above bathtub drain with little difference, while you use it you need to push and pull for its opening and closing.

While its installation and removal are the same as the Lift and Turn drains with the help of screws and simple adjustments.

Toe- Touch Drain for Bathtub:

While you see its assembly, it is the same as the push and pulls drain for the bathtub, but the only difference is its spring and use.

While you enter your bath, you just need to press it and then leave it. It will open with your toe press, and while you remove the toe with spring help, it will close.

Trip lever drain for the bathtub:

You will find levers on the front side of the bathtub, and its drain hole strainer, and a prominent pop-up-plug.

You can say it is its drawback that its removal is very confusing rather than other types. You need to take out the plate and whole the overflow tube for cleaning it. Most of the people avoid taking this drain.

Grid-Drain for Bathtub

Grid-Drain for Bathtub:

While you take this bathtub at home, you will find a plug and grated surface. Its holes help it not to become full of water. It is the preferred model, and most of the people use this model for their home because it is excellent against the water drainage issue.

Conclusion:

You have gone through our article we have tried our level best to elaborate you about types of bathtub drains.

Now you have got information and can make a better choice according to your needs, which type of drain is better for you?

What is the Meaning of Forex Trading

A swap can be called a secondary contract that enables two parties to exchange the liabilities or the cash flow from two different financial instruments.

A swap in forex mainly refers to an interest that you get or pay for the trade that you have kept open for a night. The two most common types of swaps are swap long which is used to keep a long position open for a night and swap short that is used to keep a short position open overnight.

Advantages of swap in forex trading

Advantages of swap in forex trading

There are various advantages of swap in forex trading:

● Swap is comparatively cheaper. It doesn’t include any premium charges and reduces the cost of transactions.
● Swap can also help to fluctuate the risk and also enables fluctuations for long periods of time.
● Swap also conserves the information and is very flexible in the case of informational advantages.
● Swap is very long-lasting and can be run for several years whereas in the case of forwards and futures they are for a very short period of time.
● Swap enables a better match between the liabilities and revenues of the company.

Swap basically means the interest in forex. And the forex continues for 24 hours so the swap is the interest in trading that is kept on position overnight.

The interest rate swaps have a necessary and large number of advantages that make them very prominent with the economical institutions, but there are also a few disadvantages that hinder their potentials. The swap agreements subjects to a similar default risk that is experienced in forwarding contracts, check here.

Types of swaps

There are various types of swaps and each serves a particular objective. Swaps have varieties due to its adjustable nature.

Interest rate swap

The Interest rate swap is one of the most popular types of swaps. They enable two companies to trade the fix and floating cash flow on an interest.

Currency swap

The currency swaps offer you profitable ways of hindering the risks in forex. In the currency market, the transactional value of the capital changes and also exceeds all the other present markets.

Commodity swaps

These types of swaps are the most common swap among the people and the companies. For manufacturing the finished products they utilize the fresh materials. In the case of commodity swap, it allows receipts of the commodity prices after payment that is against the fixed rate.

Zero-coupon swap

As similar to the interest rate swap, The zero-coupon swap also offers flexibility to any one of the parties in the swap transaction. In the case of a zero-coupon swap, one party does not have to pay any payment in any fixed term, but one of the parties has to pay a fixed installment on the fixed schedule.

Total return swap

In this type of swap, the investor gets the advantage of acquiring securities, without having the original ownership. It is a contract between the payer and the receiver. The total return swap includes all the income and capital.

How to Store Truffle Oil?

The truffle oil can be one of the important ingredients used today in kitchen to improve the taste and flavor of some foods. A little amount of truffle oil can elevate the taste of popcorn, pizza, pasta, and eggs like other delicious things. The taste of roasted potatoes can be improved in an unmatched way by adding the truffle oil into it. However, you have to remind yourself that truffle oil is not prepared or made just like the other oils. You make the truffle oil by mixing olive oil with a few ingredients.

As a beginner, you have to fit in your brain that the truffle oil is made by infusing olive oil with white or black truffles. The natural taste of the olive oil could be earthy .that could be quite incredible for many people. Somehow, you can determine the dishes you can prepare with the help of the truffle oil. But it would be difficult to know how you should store the truffle oil to use it for a long time. You can continue reading at our site to know the best storage options you have for the truffle oil.

Conversely, it is important to recall that the truffle oil can lose its taste and aroma within some months. According to the experts, the truffle oil is the best to use till eight months. It means the truffle oil can last for nearly eight months or more. But you can preserve the flavor of the truffle oil by storing them properly.

Let take a glimpse at the following ways you can use to store the truffle oil:

Refrigerators

The first and foremost option you have to store the truffle oil is use of your refrigerators. Since refrigerators can give the cool and dark place truffle oil needs, the can be extremely important to use. It will help in preserving the flavor of the truffle oil for sure. If you do not have the refrigerators, make sure you will look for any other option.

Close the Storage Containers Tightly

It does not matter which kinds of storage containers you will use to store the truffle oil but they should be tightly closed. If you close the storage containers tightly, you have higher chances of preserving the taste.

Use the Truffle Oil Over A Limited Time

Though this is not a storage option but it can be an effective way to use the truffle oil over a long time period. The experts recommended using the truffle oil within three or four months after opening oil. You should continue reading at our site now to know other ways to store the truffle oil.

Transfer the Truffle Oil from One Container to Another Container

Transfer the Truffle Oil from One Container to Another Container

Last but not least, it is imperative to know that you can preserve the flavor of the truffle oil by transfer in it from one container to another cautiously.

With the help of the mentioned above paragraphs, you might have become familiar with the best options and ways to store the truffle oil to preserve its flavor.

How to Make the Holes In Ceramic Tiles?

Ceramic tiles are the best in the usage of surface tiles. It is designed roughly. But is can shatter easily and it is tricky to handle. Then the correct type of drill is required to make the holes in ceramic tiles. A cone-shaped hole required mostly for very durable usage. Drilling with carbide tips used here, and the low-speed drilling make the hole easily in the ceramic type tiles. In this kind of tiles need diamond tips for long-lasting holes. It takes more time for processing the hole. Slow and steady required preventing the damage in the ceramic tiles and find more info here. Patience in time required to further processing. Very little pressure needed to drill the ceramic tiles. Hence the time is increased for the surface.

Holes In Ceramic Tiles

Regular type drill bits make the tiles ugly. So the diamond cut drill is to be used in this kind of ceramic tile. Without cracking the tile, the hole is created. As mentioned earlier, the drilling through the ceramic tile has required the specialist. Moreover, the ceramic tiles are strong enough in the hard surface area. The drill bits used in ceramic tiles are carbide tipped and diamond-tipped as well.

How Long Will It Take For Drill In The Ceramic Tiles?

The ceramic tiles of each hole take about 5 minutes. Normally, the carbide tips are used to hole the ceramic tiles. Drilling through the ceramic tile is not as much easy process. Carbide tipped drill bits are the most cost-effective and which is more suitable for long-lasting usage. It is much easier to proceed with the help of electrical tape over with standard masonry. Initially, select the place where the hole wants to place. Then proceed further and mark it up. And then slowly drill the ceramic tiles. Unlike with the dried wall, it is much tough job for drilling. The unwanted repair screw is needed. It is fitting is strong enough in different size for the wall anchor. Here do not use the hammer drill at any cost. Then it will damage the entire tile area. Keep steady and nice pressure to drill it in ceramic tiles.

How Long Will It Take For Drill In The Ceramic Tiles

The diamond-tipped holes saw is used for drill through the tiles. Regular cutting is maintained for sharp holes provided in carbide drill bits. Heavy metals also need this type of drilling. So the ceramic tiles can drill easily by using the carbide tipped and diamond-tipped drill bits and find more info here. In exterior walls, there is some installation of things is important. Hence, the above instruction is to follow for screwing the holes in every ceramic tile. The majority of small diameter holes will cut the tiles and can fix all things behind the ceramic tiles. The driller is next to set the hammer mode for drilling in ceramic tiles. Because the standard drills bits do not work on the tile. But in ceramic tile, diamond drill bit process is involved for preceding the holes.  Thus the way the holes can make in the ceramic tiles.

How To Decorate Your Home So It Takes Less Cleaning?

Building a house is the dream for many people and they would like to make interior and exterior design as well. It gives a gorgeous look to your dream house so people give more importance to interior designing. You have to maintain the house as new as build most of the people didn’t care about the maintenance of the house and after some years this will leads to an awkward moment.

Therefore, from beginning itself you have to concentrate on cleaning and maintain the same look of your house. You have to do more hard work and effort to make it possible because maintenance is not that much easy as you think. Some of the essential tips and trick you should know and follow them in an effective method. In another way, most of the people go with the decoration of the house. The decoration is also part of making your house clean and look beautiful.

Make Your Home Classy Look

Make Your Home Classy Look

If you make any decoration in each room of the house it will give you an elegant look. And also reduce your burden of cleaning. It is one of the important tricks to keep your house clean and neat all time. Whenever guest or friends come to your house it will give a gorgeous look and impress them at first sight. It is an essential thing for everyone because they expect this fact from each visitor to the house. There are huge types of decoration can be done for any style of the house even it is a modern style house or traditional style house.

You can make your own craft or design to decorate your house otherwise approach the best service for the unique and stylish design for decorations. If you want to know more about the home decoration you can visit this https://www.hellobrando.com/ website for further details. In this site, you get some clear information about home decoration tips and many other tips. To keep your house clean and less dirt, the decoration is the best option. It is used for dual purpose and gives an elegant look to your dream house.

Choose Fantastic Home Decoration

People take a huge effort to build the house completely and faced lots of struggle in it. Consequently, they have more connectivity with their house that’s why most people would like to keep it beautiful and spend lots of money on decorations. On the other hand, it is your responsibility to keep your house or living place to be clean and neat. That’s is the sign of health and hygiene lifestyle so people proving it every time.

Choose Fantastic Home Decoration

If you are healthy then automatically you can be wealthy. To lead a healthy life you have to keep your surroundings clean and hygiene. It is the most vital fact than other things in life, everyone is following according to their economic status. For decoration, you can hire the best service they will give an excellent idea and guide you to do the work effectively. Otherwise, you can make a decoration of your own with the help of online videos and guidance.

How to Remove Tile from Terrazzo Floor?

In the floor and wall treatment, the terrazzo flooring is very much important for beauty of entire floor and wall as well. The beautiful tiles are providing the extra beauty to the floor and wall. Nowadays, tiles are necessary to for styling the terrazzo floor. Terrazzo surface is normally grey and condensed. There are more colour and graphical elements are used in terrazzo floor. For the past years, the tiles are not in trend. But nowadays, both the floor and wall required to designated and which give more style and looks good for everyone.

The few years ago, the people thought that tile surface is polished and where the slippery will happen while using. But nowadays there are much more types of tiles available for terrazzo floor. Moreover, the tiles are not getting slippery when they get wet for all. Periodically, the terrazzo flooring average life cycle is 75 years. Then the nonporous terrazzo flooring is water resistance, and which is the smarter choice of every bathrooms. Every remodeling of the bathroom, terrazzo surface is the initial procedure with existing concrete.

Tile Over or Tile Removing Process in the Terrazzo Surface:

There is much more information included to tile over the terrazzo surfaces. Terrazzo flooring is low maintenance for every home and office. Terrazzo is also the type of mosaic which is the traditional material for the resilient surface. However, the terrazzo is the composite material which consists of chips in marbles or other suitable materials like granite, glass and quartz etc. Chemical binding and physical binding or a combination with the cements pours is the terrazzo material as defined. Floor restoration is one of the process to cover up the tiles in the terrazzo surface.

The ground down terrazzo floor is polished and waxed. After that the sealed terrazzo floor is difficult to removing and which takes more time. Without damaging the terrazzo surface, pop the tiles by using the wide chipping hammer is needed in the process. First, make sure the complete area is not digging the hole in the appropriate surface. Hold the chisel at the edge of the first tile in the surface. Then the edge is determined then switch on the power. Slowly work the tile directly with the chisel. Then the tile will get weak. Then it will be weakest if it meets the concrete surface.

Planning for Removing The Tile From The Terrazzo Floor:

Planning for Removing The Tile From The Terrazzo Floor

Normally, the terrazzo floor is cement based. So, the setting and installing of every tile is easy and similar way for all. But the removal of tiles is just difficult. Then there is a key to successfully tile over the terrazzo. Initially, determining the binder of first tile is important. Not at all, the material of every tile with the concrete is bonded correctly and strongly. Hence, there is a requirement to determining the weakest tile in the floor is important. Strip and grinding the small surface in the weakest binder in one tile is needed for removing the tile from the terrazzo. These are more information of the most effective floor grinder is used for tile over the terrazzo floor.